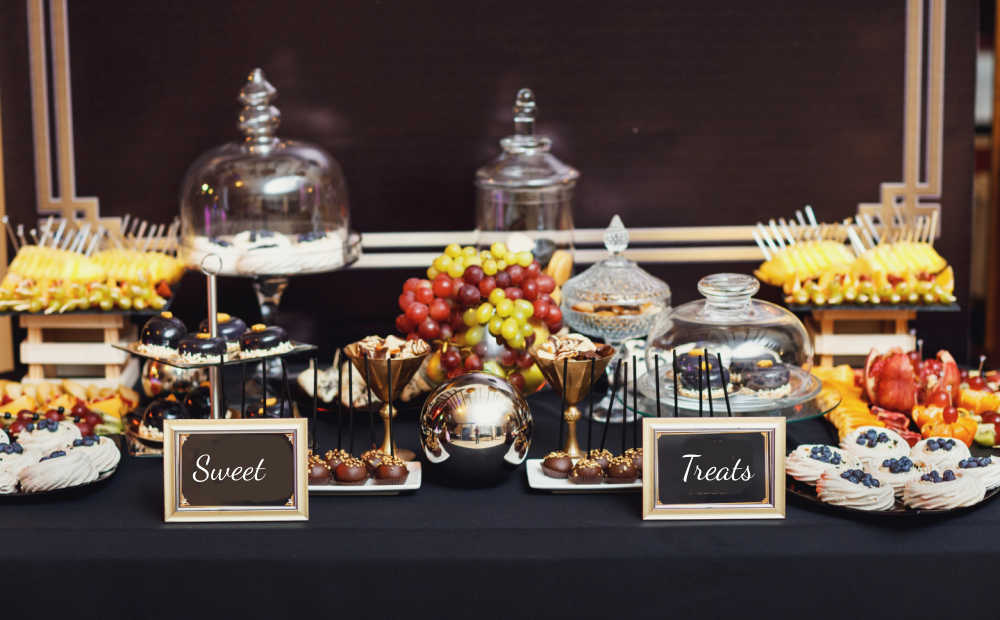
Hosting a sweet celebration at home can be a delightful experience, especially when you add a personal touch with a DIY dessert buffet. Whether it’s a birthday, anniversary, or just a gathering of friends, a beautifully curated spread of sweet treats can elevate the occasion. In this comprehensive guide, we’ll explore everything you need to know to create a stunning dessert buffet that will impress your guests and leave them craving for more.
Planning Your DIY Dessert Buffet
Setting the Scene with Theme and Decor
Creating an inviting atmosphere sets the stage for your dessert buffet. Consider a theme that reflects the occasion, whether it’s whimsical, elegant, or seasonal. Decorate your buffet table with coordinated tablecloths, themed decorations, and ambient lighting to enhance the mood.
Choosing the Perfect Desserts
Select a variety of desserts to cater to different tastes and preferences. Include a mix of classics like cakes, cookies, and cupcakes, as well as some unique offerings such as homemade truffles, fruit tarts, and gourmet chocolates. Make sure to consider any dietary restrictions or allergies among your guests when planning your menu.
Estimating Quantities
Ensure you have enough desserts to satisfy all your guests’ sweet cravings. As a general rule of thumb, plan for at least two to three desserts per person. Consider the duration of your event and adjust quantities accordingly. It’s better to have leftovers than to run out of sweets!
Creating a Timeline
Prepare a timeline to ensure everything runs smoothly on the day of your event. Schedule tasks such as baking, decorating, and setting up the buffet table in advance. Allow yourself plenty of time to avoid last-minute stress and enjoy the celebration with your guests.
Preparing Your DIY Dessert Buffet
Baking and Preparing Desserts
Start by baking or preparing your desserts a day or two before the event, if possible. This allows flavors to develop and gives you time to focus on other tasks on the day of the celebration. Remember to follow recipes carefully and allow for adequate cooling and chilling time.
Assembling the Buffet Table
Arrange your desserts on a visually appealing buffet table, taking care to vary heights and textures for visual interest. Use cake stands, tiered trays, and decorative platters to showcase your treats. Consider adding fresh flowers, themed decorations, or signage to enhance the presentation.
Setting Up Serving Stations
Create separate serving stations for different types of desserts to prevent congestion and make it easy for guests to serve themselves. Provide utensils, napkins, and plates at each station, along with labels indicating the name and ingredients of each dessert.
Adding Personal Touches
Inject your personality into the buffet table with personalized touches such as handwritten menu cards, themed decorations, or DIY party favors. Consider incorporating elements that reflect your style and taste to make the celebration truly memorable.
Enjoying Your DIY Dessert Buffet
Encouraging Exploration and Indulgence
Encourage guests to sample a variety of desserts by highlighting each offering with enticing descriptions or serving suggestions. Create a sense of excitement and anticipation by unveiling new treats throughout the event.
Capturing Memories
Document the celebration with photos or videos to cherish the memories for years to come. Encourage guests to share their favorite moments and desserts on social media using a designated hashtag, if appropriate.
Expressing Gratitude
Take a moment to thank your guests for joining you in celebrating and indulging in your sweet creations. A heartfelt expression of gratitude goes a long way in making guests feel appreciated and valued.
FAQs (Frequently Asked Questions)
What are some budget-friendly dessert options for a DIY dessert buffet?
For budget-friendly dessert options, consider homemade treats like cookies, brownies, and rice krispie treats. These can be made in large batches at a fraction of the cost of store-bought desserts.
How far in advance can I prepare desserts for my DIY dessert buffet?
Many desserts can be prepared several days in advance and stored in an airtight container or refrigerator until ready to serve. Check individual recipes for specific storage recommendations.
How can I accommodate guests with dietary restrictions or allergies?
Offer a variety of dessert options that cater to different dietary needs, such as gluten-free, dairy-free, or nut-free alternatives. Clearly label each dessert with any relevant allergen information to help guests make informed choices.
What are some creative ways to decorate a DIY dessert buffet table?
Get creative with decorations by incorporating themed props, colorful linens, or festive banners. Consider adding height and dimension to your buffet table with decorative stands, tiered trays, or elevated platforms.
How can I prevent desserts from melting or becoming too soft during warm weather?
If hosting an outdoor event in warm weather, consider serving desserts that are less prone to melting, such as cookies, bars, or fruit-based treats. Keep desserts shaded and provide chilled serving platters or ice packs to maintain freshness.
What should I do with leftover desserts after the event?
Leftover desserts can be stored in airtight containers or freezer bags and enjoyed later. Alternatively, consider donating excess desserts to local shelters, food banks, or charitable organizations to minimize waste and spread joy to those in need.
Conclusion
Hosting a DIY dessert buffet is a wonderful way to celebrate special occasions and create lasting memories with loved ones. By following these tips and guidelines, you can create a stunning spread of sweet treats that will impress your guests and leave them craving for more. So gather your ingredients, unleash your creativity, and get ready to host a sweet celebration that will be the talk of the town!

